How to Improve the Kerb Appeal of a 1930s Semi Without Losing Its Character
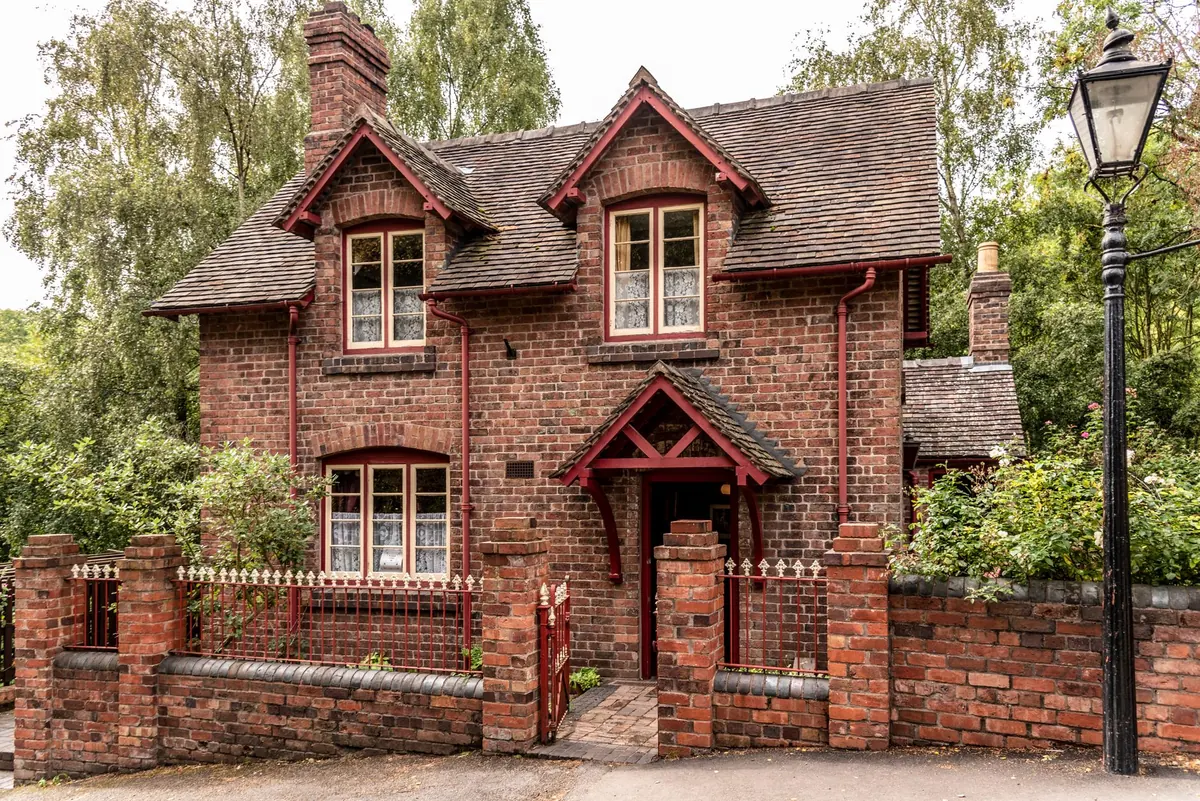
The between-the-wars semi is one of the quiet successes of British housebuilding. Generous without being grand, symmetrical without being stiff, it was designed to be seen from the road: a bay or two, a gable, a path, a hedge, and a front door you can spot from thirty yards. Which is why the front of the house rewards care in a way the back garden never quite does.
Improving kerb appeal on a 1930s semi is not about making it look new. It is about making it look cared for, with the details that were meant to be there doing the work. Here is how to spend your money well, roughly in the order it makes sense to spend it.
Start at the front door
The front door carries more weight than every other element combined, and it is where most 1930s semis have lost the plot. Original doors were solid timber, often with a small glazed panel or a leaded top light, set back in a shallow recess or under a modest canopy above a step. Plenty have been swapped for a composite door that fits neatly but reads wrong from the pavement.
If yours is original, repair it. A door that has been stripped, mended, primed and painted properly, with new ironmongery in brass or black, will beat almost any replacement for character. If it is genuinely beyond saving, ask a joiner to copy the original profile rather than buying a stock design with a fanlight moulded into it. A plain glazed panel and a separate top light cost little and do far more for the elevation than any amount of moulded plastic.
Then choose a colour with some conviction. Deep green, oxblood, black, navy and a soft off-white all sit well against red brick and pebbledash. Keep to three colours across the whole elevation — brickwork counts as one — and repeat the door colour on the gate or railings. Paint the step if it was painted, and keep it swept; a grey, gritty step has a way of making even a good door look tired.
The small hardware matters more than you would think. A brass letterplate, a decent knocker, a black iron handle and numerals that match — painted white on the door itself, or cast in brass and screwed to the reveal — set the tone before anyone has consciously noticed the windows.
Get the windows right and the rest follows
Interwar semis were built with slim frames and a lot of glass, in steel or softwood. Whatever yours started with, the proportions are the point: slender frames, deep reveals, a horizontal transom in the bay, and a top light that lines up with its neighbours. Stand on the pavement and look along the terrace — the bays should read as a run of horizontal lines, not a row of white boxes.
Bulky white uPVC casements with wide profiles flatten the facade, and the effect is hard to unpick later. If your frames are sound, keep them. Draught-proofing, repair and repainting cost far less than replacement and lose nothing. A weekend with a scraper, some linseed putty and a tin of eggshell will often achieve more than a five-figure order.
If replacement is unavoidable — rusted steel and rotten softwood are both common at this age — specify slimline aluminium or timber with sightlines close to the originals. Match the opening pattern, keep the transom, and resist adding leaded diamonds or Georgian bars to a house that never had them. Ask to see a full-size sample of the frame section before you sign; the difference between a 60mm and a 100mm profile is the difference between a window and a hole with glass in it.
Check before you order. Replacement windows are usually straightforward, but in a conservation area, or where an Article 4 direction applies, you may need permission. A call to the local planning authority's duty officer is free and saves a lot of arguing later.
Brickwork, render and pointing
Original brickwork on a 1930s house is usually a warm red or a mottled multi, sometimes lifted by a contrasting brick or tile course. It is worth keeping, and surprisingly easy to damage.
The most common mistake is repointing in hard cement mortar. A wall needs to dry out through its joints; impermeable mortar pushes moisture into the brick instead, which then blows in frost. If your pointing is crumbling, rake out the joints and repoint with a mortar softer than the brick, ideally lime-based and matched to the original colour, finish and depth. Flush or bucket-handle pointing suits these houses; deep ribbon pointing does not.
Cleaning needs the same restraint. Sandblasting and acid washes strip the fired surface off the brick and leave it permanently porous. Gentle hand-brushing, or a low-pressure steam clean by someone who knows the difference between cleaning and eroding, will lift decades of grime without taking the face off the wall.
Where the house is pebbledashed or roughcast, the same logic applies: it is a breathable finish, and painting it is a one-way door. Not necessarily the wrong door — a well-painted roughcast in a soft lime white can look excellent — but you will be repainting it every seven or eight years from then on. If the render has cracked or blown, patch it with lime or a matched proprietary render rather than cement, and look for the cause first. Blocked gutters and failed downpipes cause more damp staining on these walls than anything else.
The front garden, path and gate
Interwar front gardens were small, formal and mostly for looking at. The layout was nearly always the same: a short path from the gate to the step, a strip of lawn or a bed either side, and a boundary of low brick wall, privet or a clipped hedge. Anything that follows that pattern will look right.
The path is the part people notice without knowing they have noticed it. Original paths were brick, a patterned concrete slab, or plain grey flags with a brick edging. If yours is intact, clean it, re-sand the joints and leave it alone. If it has gone, replace like with like rather than with resin-bound gravel that creeps into the lawn.
- Hedge: privet, box, yew or lavender, trimmed hard twice a year. A 60–90cm boundary shows the house off; a 2m leylandii hides it and darkens the front rooms.
- Gate: match the front door colour, in a simple vertical or open-frame pattern, and keep it low.
- Parking: if you need a driveway, keep it as narrow as practical, use permeable surfacing, and leave a planted strip at the boundary so the house still sits inside a garden rather than behind a car park.
- Pots: one matching pair either side of the door, planted for winter and summer interest, is enough. Four mismatched pots are not.
The details that finish the job
These cost little compared with windows, and they carry a surprising share of the overall impression.
- Roof: replace slipped or cracked tiles, remove moss gently rather than scraping at it, and keep the ridge line straight.
- Gutters and downpipes: half-round cast aluminium, or good-quality half-round uPVC in black or dark grey. Dribbling downpipes leave the streaks that undo every other improvement.
- Fascias: timber, painted, in the same colour as the window frames — not bright white plastic.
- Chimney: a pot that matches the neighbours', plus a cowl if the flue is unused.
- Lighting: one wall lantern either side of the door, or a single lantern above it, in warm white. A floodlight aimed down the drive does more harm than good.
The test for any change on the front of a 1930s semi is simple: could this plausibly have been there in 1935, and has somebody clearly looked after it since?
Where to start if the budget is tight
Most of the impression comes from the first few hundred pounds, not the first few thousand. If you are doing this in stages, work in this order:
- Clean everything: windows, brickwork, path, door furniture, paintwork.
- Repair and repaint the door, then change the ironmongery.
- Clear and mend the gutters and downpipes.
- Cut the hedge back, edge the path, clear the joints, and put two matching pots by the door.
- Repoint or repair where things are genuinely failing, not where they merely look old.
- Replace windows, roof or render only when they need it — and then spend the extra on getting the proportions right.
Done in that order, a 1930s semi stops looking shabby long before the big bills arrive. And it still looks like itself, which was the point all along.
Photo: John Nail / Pexels
You Might Also Like
Size, height, position and use limits decide whether a garden room needs planning permission. Here's how permitted development works, and where it stops applying.
Internal or external? A practical comparison of retrofitting solid brick walls — cost, thickness, breathability, disruption and the planning constraints that decide which route is possible.